Summary
Learn how to publish you website using Adobe Dreamweaver. We show you how to add your DomainsFoundry FTP account using Dreamweaver’s Manage Site tool and show you how to publish your site. This tutorial is for Dreamweaver CS4 on Mac OS X.
Adding your FTP details
- Open Dreamweaver.
- From Dreamweaver’s top menu click Site > New Site.

Click Site and then click New Site - In the pop-up window, click Advanced.
- Select Remote Info.
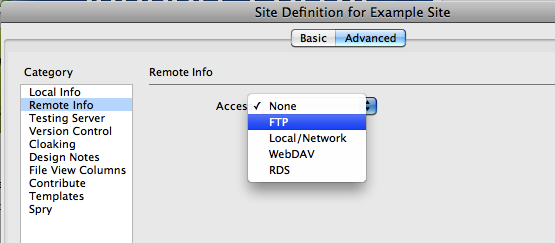
Click Advanced, Remote Info and select FTP - Enter your FTP details.

Example FTP settings - Click OK to return to Dreamweaver.
Forgotten your FTP settings? Read [[What are my FTP connection settings?]]
Advanced FTP settings
- Enter /public_html/ for your Host Directory. Windows Shared hosting users should use /httpdocs/.
- Try enabling/disabling Use passive port
- If your Mac is behind a firewall try Use firewall
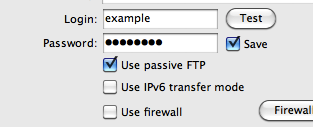
Advanced FTP options in Dreamweaver OSX
Uploading files
- In the Files panel (Window > Files) select your site’s root folder.
- Click the Put Files button (blue up arrow).
- Dreamweaver will ask if you want to put the entire site. Click OK.
- Your site will now upload to your DomainsFoundry account.
- Open your site in your browser to make sure your site uploaded correctly.

Select your site's root folder and click Put file(s)
